I enjoy crafting and like to try my hand at different things. If there is anything that you see on here that you would like made, please feel free to contact me bumblebeescraftden@gmail.com or by going to my page on Facebook www.facebook.com/bumblebeescraftden. You can post on the wall or send me a message there. I appreciate any comments that people leave so please feel free to comment!!!
Thursday, 26 November 2015
Handmade Christmas Market 28 November 2015
Tuesday, 20 October 2015
Hello - it's been a while!
I have not done much crafting as I have been working and have to be up early to get the bus to town and then by the time I get home I am usually really tired.
I have also been organising a Christmas Market again at my local church hall - not sure that I will have much to sell there this year!
I have made a few bits though so will just post some photos of those for now!!
Saturday, 15 August 2015
Papier Mache Bowl
I am blogging after quite some time! When I came back from India at the end of June I didn't really have anything to blog about and I haven't been feeling very creative so had not made anything much either!
Recently, I've been thinking about what to make for Christmas this year and have made a few things. I am flying out to Goa on 1 December for 3 months so won't really need to do much this year but I will make up some things to take out as gifts for friends.
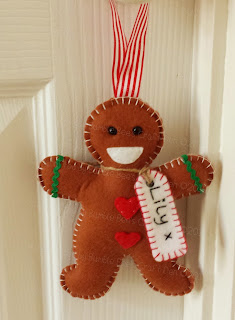
One thing I have made are these large gingerbread men to hang from the door. They are quite a bit bigger than my usual tree decoration ones and look lovely hung on doors. I am going to personalise them with a tag like the one in the photo below.
Thursday, 28 May 2015
Goodbye Goa
I came to Goa for 2 weeks to catch up with old friends that I have not seen for 12 years! I spent many years splitting my time between the Uk and Goa. Usually, I came to escape the cold British winters and would spent approx 6 months a year in Goa.
During that time I made alot of friends and although I am in contact with some of them on Facebook I thought it was high time to pay a visit and catch up with them again.
So, my 2 weeks has come to an end and tomorrow I will fly back to Bombay to stay with my friends until 19 June. I feel very sad to say goodbye to my Goa friends but I am hoping that maybe next year I can come again for longer.
It's extremely hot here right now as India is experiencing a heatwave. In some states people have died due to heat related problems. Luckily for me I have an air con room.
The monsoons will start soon but I will be long gone by then.
So I say goodbye to Goa but know that this time I will return soon :)
Sunday, 10 May 2015
Salam Bombay!
Hi everyone. I've been a bad blogger lately mainly because I have not been up to much!!
Last week I flew out of the UK and I am currently in Bombay sweating my butt off in 36 degrees. I am here until 19 June and plan to go to Goa as well. So instead of crafty posts you may get some of my trip.
I am visiting friends and catching up after several years so enjoying meeting everyone again.
Here is the Bombay sunset from the other night.
Wednesday, 1 April 2015
Easter Bunny Box
It's made using the envelope punchboard and a selection of punches although I used dies for some of the shapes as I didn't have the punches!
Here is my finished bunny box
Pop along and watch Linda's video and have a go at making one yourself!
Tuesday, 31 March 2015
Curvy Keepsake Sheep Treat Box with Tutorial
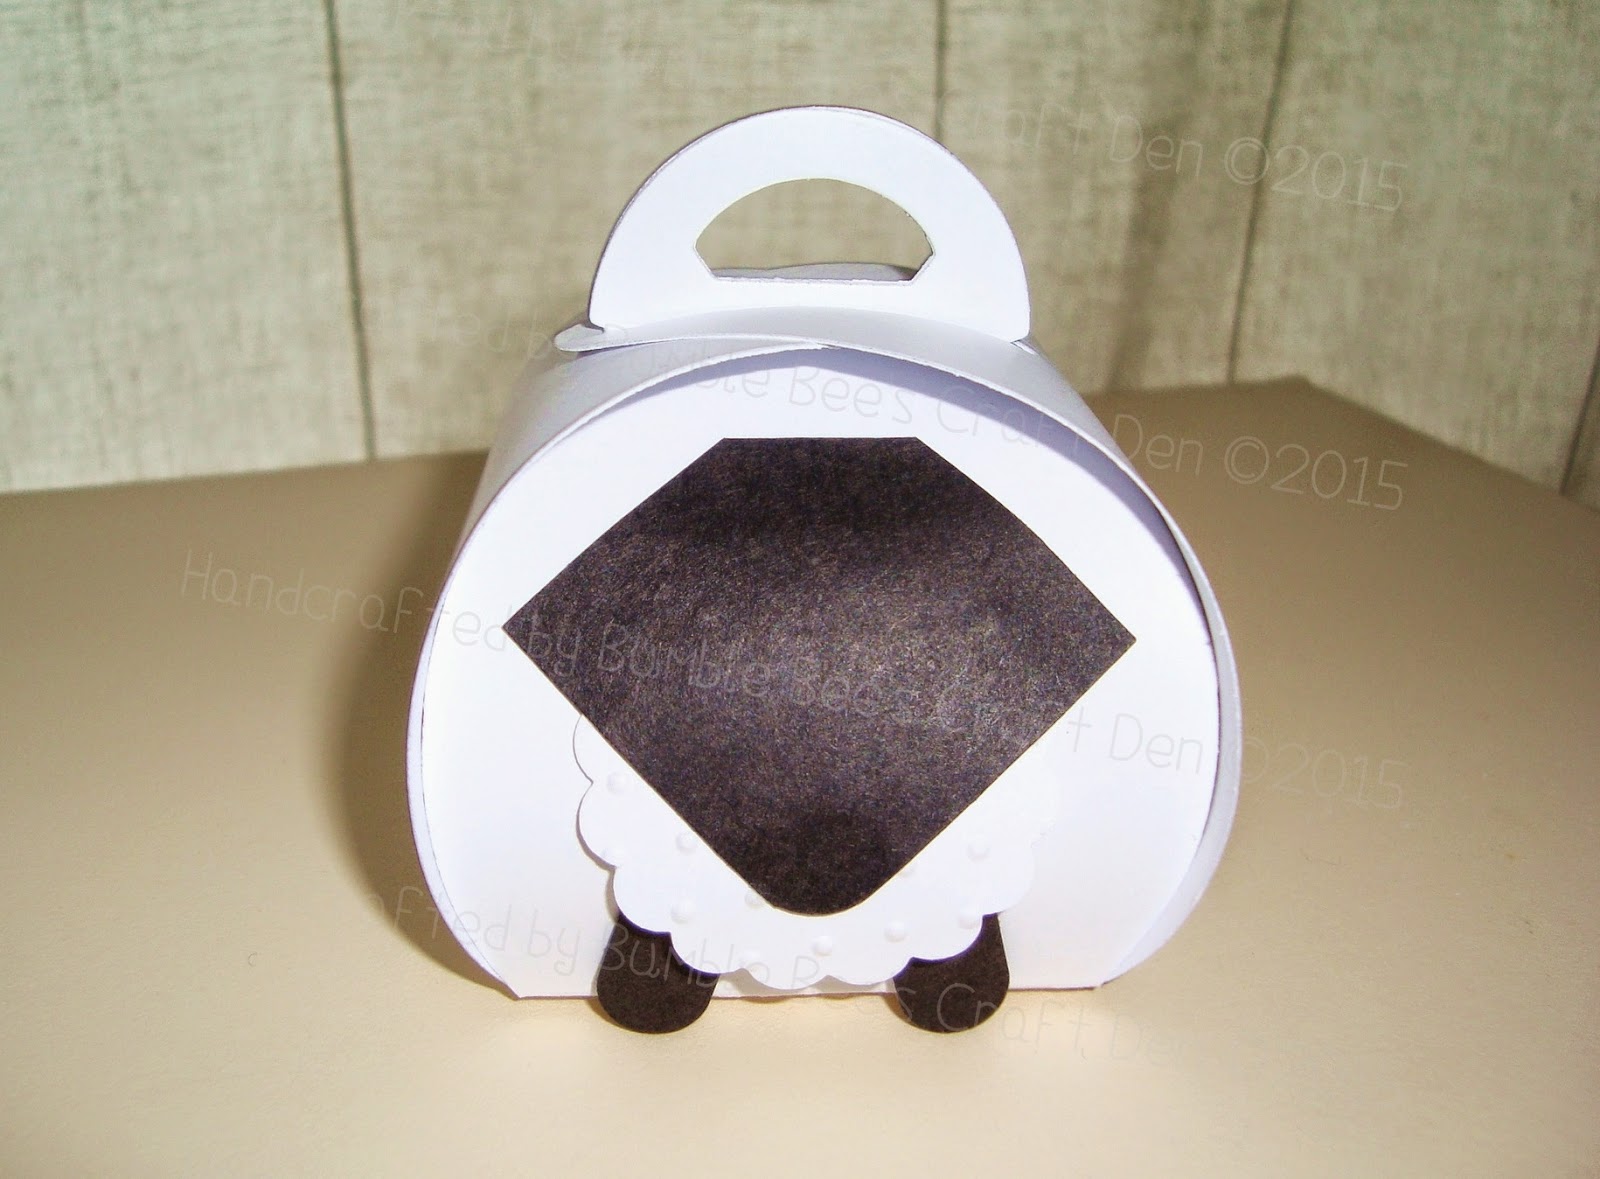
Here is my finished box
He reminds me of Shaun the Sheep!!
This one was more fiddly to make than the owl that I showed you yesterday. I've done a tutorial to hopefully show you how I made the sheep design.
To start you will need to make a white curvy keepsake box using the cutting die from Stampin Up. Make sure you curl the sides with your bone tool.
These are the all of the bits that you will need to make the sheep treat box. I did cut another very small black circle which is not on the photo as I decided to add a nose at the end!
For the front body part I punched out a white scalloped circle and embossed it using Swiss Dots embossing folder. I used a small Spellbinders flower die and cut out 3 in white card for the fleecy bit on top of the head, I also embossed these to give some texture.
The head was made by punching out a 3.5cm square in black card - I used my corner chomper to round one of the corners and then cut the opposite corner off completely.
The ears were made using the wing from the Build a Bird punch from Stampin Up.
The eyes need to be smaller than the ones I made for the owl box so you will need to find 2 different sized small circle punches or dies.
Lastly, for the legs I used the Word Window punch from Stampin up and cut it in black card which I then cut in half.
To start take the legs and stick them towards the bottom of one of the panels which has the loop top.
Now take the scalloped white circle and using your bone tool gently curl it so that it has a nice curve to it. Now add glue on the back of one half and on the other half stick a few foam pads to lift it slightly. You will need to hold this down for a minute or so to make sure the glue sets.
Next comes the face, position this where you want it, not too high as you still have to add the fleecy bits on top of the head!
Position the ears and put glue on the back of the top section only and stick to the box.
Take the 3 small flower shapes and stick them at the top of the head.
You are ready to put the eyes on now - decide where you want them and stick with glue. Now when I got to this stage I decided my sheep needed a nose so cut a small black circle of card and stuck it on!
Taadaa!! You now have your finished sheep curvy keepsake treat box! Cute isn't he!!
Monday, 30 March 2015
Curvy Keepsake Owl Treat Boxes with Tutorial
Look at these gorgeously, cute owl boxes I made!! I'm in love with them!! There are many different versions on Pinterest and this is what I have come up with.
Would you like to know how to make them?
You will need the Curvy Keepsake Die from Stampin Up but for everything else you can improvise!
So the die itself looks like this - you need to cut 2 pieces out for your basic box.
The other components that you will need
Decide which side of the box you would like to be the front (loopy handles side is your front) and then stick the patterned paper onto the box with the straight edge right up to the bottom edge of the box.
Now we come to the wings - you need to fold over a small bit at the top of each wing.
For the eyes stick the black circle onto the coloured (iris part) circle and with a white gel pen mark on the black circle. You then stick this onto the white eyeball part of the eye - see pic below. (sorry light was not great when I took pics!)
Take the wings and with your bone folder curl each wing outwards.
Position the wings and put your glue on the bit that you have folded over and underneath this little folded tab. Stick a wing each side, taking care not to put them too high up as otherwise they will interfere with the opening and closing of the box. you will need to hold each wing in place for a few minutes until the glue sets.
Now all that is left to do is add the feet. Position them so that they are equally spaced and then apply glue to 2 of the petals and then stick underneath so that only the 3 unglued petals are showing.
This is the Petite Petals punch from Stampin Up that I used.
Edited** Customer Service from EK Success
My faith has been restored in them now and I will continue to buy their products and enjoy using them!
Tuesday, 17 March 2015
Cute Bunny Treat Boxes for Easter Using Stampin Up's Curvy Keepsake Die
Today, I wanted to show you this fabulously, versatile box die from Stampin Up called the Curvy Keepsake Box. It is a thinlits die set comprising of the main box die along with some tags.
You need to cut 2 of the box panels and then you simply stick them together so that you have the same sides facing each other. The basic box is cute but looks even nicer when decorated.
With help of punches and dies, you can make up all sorts of designs. Have a look on Pinterest, it is full of them! I have set a board up decdicated to Curvey Keepsake ideas - you can find it here.
I liked this tutorial so have based mine on it - it is from Sam at Sam's Sentiments.
Here are the ones that I made
I used Spellbinders ovals for the ears as I don't have any oval punches!
I filled them with 10 of the little chocolate eggs from Lidl. I had to get some more yesterday as I had eaten some of the last lot!!! They were still on offer £2 for 2 bags or £1.29 a pack.
I love these little boxes and I am sure I will be making some more designs soon.
If you are in the UK, the die can be purchased from my friend Tracey George here.


