Here is my finished box

He reminds me of Shaun the Sheep!!
This one was more fiddly to make than the owl that I showed you yesterday. I've done a tutorial to hopefully show you how I made the sheep design.
To start you will need to make a white curvy keepsake box using the cutting die from Stampin Up. Make sure you curl the sides with your bone tool.


These are the all of the bits that you will need to make the sheep treat box. I did cut another very small black circle which is not on the photo as I decided to add a nose at the end!

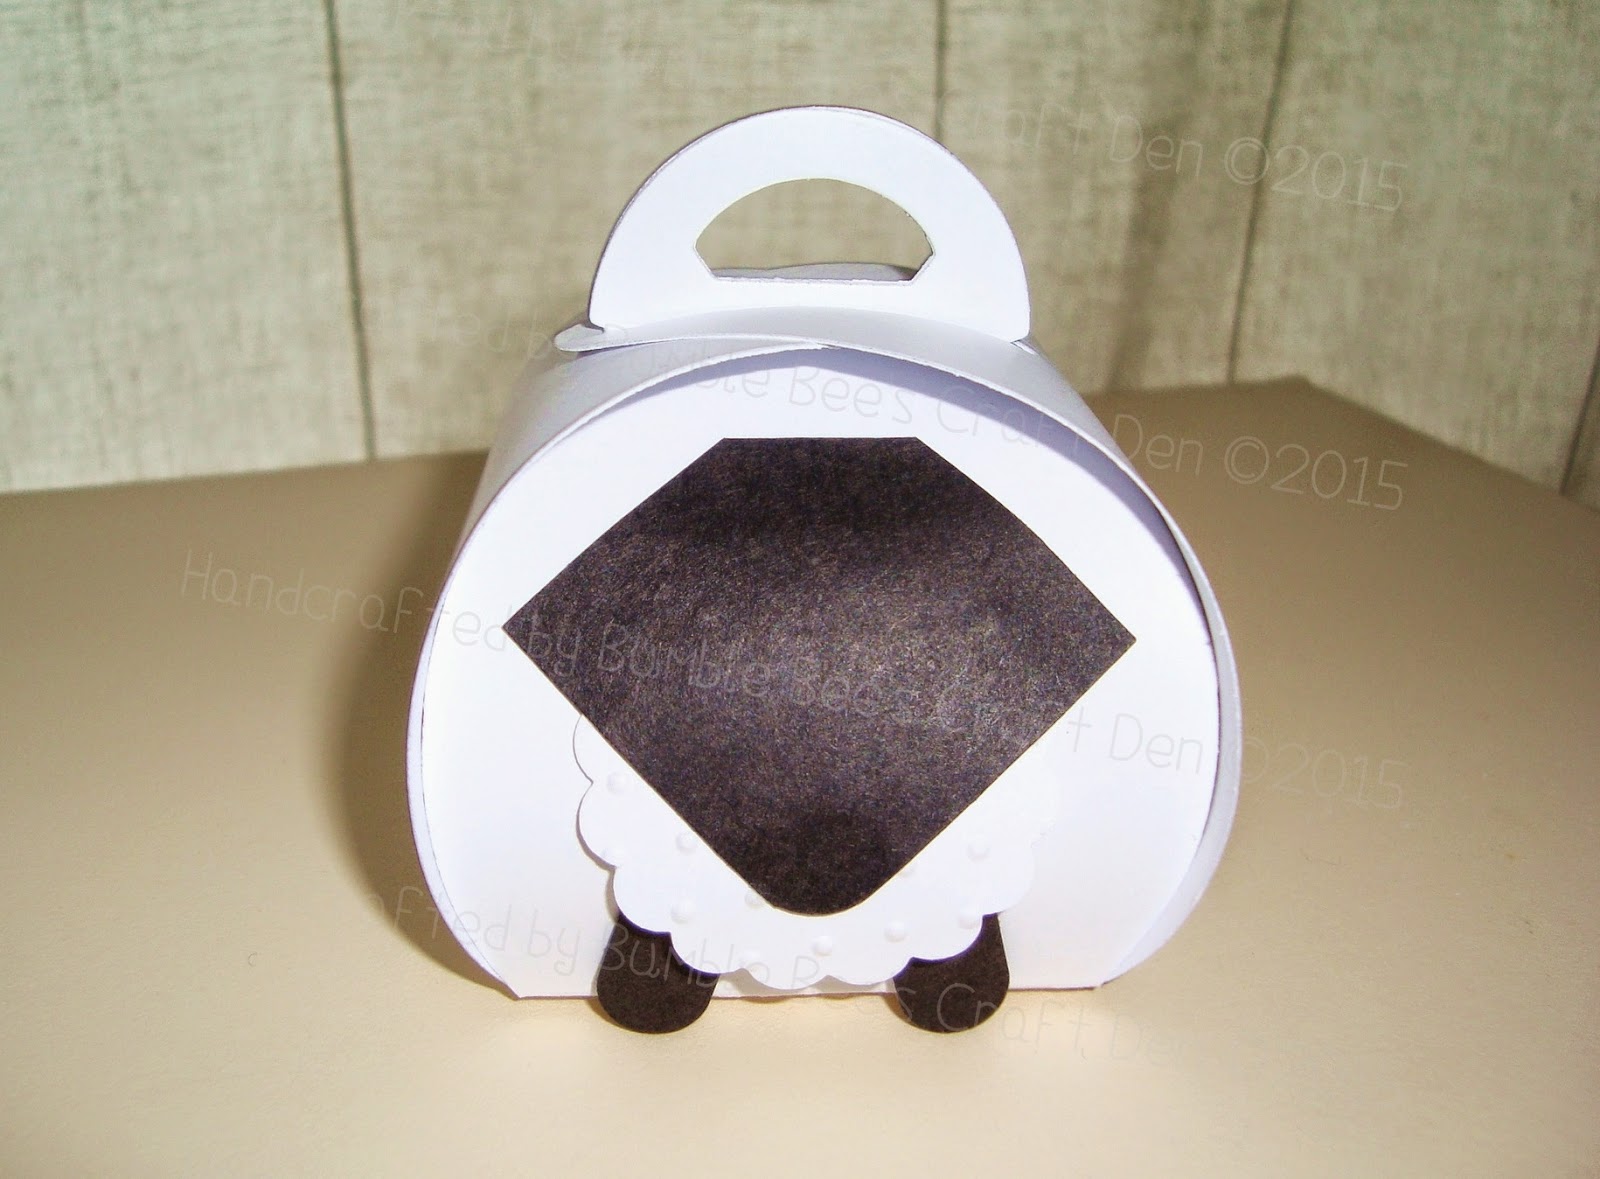
For the front body part I punched out a white scalloped circle and embossed it using Swiss Dots embossing folder. I used a small Spellbinders flower die and cut out 3 in white card for the fleecy bit on top of the head, I also embossed these to give some texture.
The head was made by punching out a 3.5cm square in black card - I used my corner chomper to round one of the corners and then cut the opposite corner off completely.
The ears were made using the wing from the Build a Bird punch from Stampin Up.
The eyes need to be smaller than the ones I made for the owl box so you will need to find 2 different sized small circle punches or dies.
Lastly, for the legs I used the Word Window punch from Stampin up and cut it in black card which I then cut in half.
To start take the legs and stick them towards the bottom of one of the panels which has the loop top.

Now take the scalloped white circle and using your bone tool gently curl it so that it has a nice curve to it. Now add glue on the back of one half and on the other half stick a few foam pads to lift it slightly. You will need to hold this down for a minute or so to make sure the glue sets.

Next comes the face, position this where you want it, not too high as you still have to add the fleecy bits on top of the head!
Position the ears and put glue on the back of the top section only and stick to the box.

Take the 3 small flower shapes and stick them at the top of the head.

You are ready to put the eyes on now - decide where you want them and stick with glue. Now when I got to this stage I decided my sheep needed a nose so cut a small black circle of card and stuck it on!

Taadaa!! You now have your finished sheep curvy keepsake treat box! Cute isn't he!!
Thanks for stopping by!