Hi - just a quick one from me today. I have made a couple more leather flowers using the same tutorial that I posted a few days back. This time I made a petal template that was much shorter than the die cut one that I made previously. This gave a smaller flower but looked very nice as well. The finished flower was approx 10cm in diameter.
Here are the 2 latest ones
I've placed a £1 coin next to them to give you an idea of the size.
These are very addicitive and I need to source some more leather scraps now to make more of them!!
You could make these out of card and shape the petals using an embossing tool rather than burning the edges! I may try this next!! They would look great on shabby chic items and you could adjust the size of the petal to suit your project.
I enjoy crafting and like to try my hand at different things. If there is anything that you see on here that you would like made, please feel free to contact me bumblebeescraftden@gmail.com or by going to my page on Facebook www.facebook.com/bumblebeescraftden. You can post on the wall or send me a message there. I appreciate any comments that people leave so please feel free to comment!!!
Thursday, 3 April 2014
Monday, 31 March 2014
Lunch at Brick Lane and Leather Flowers
Well we've had a lovely couple of days weatherwise in the South West of England. I caught the coach up to London on Saturday and spent the afternoon with a friend of mine who was over from India. It was so nice to be able to roam around in the sunshine without a coat. We did alot of walking and went to Brick Lane for a very tasty lunch in a Bangladeshi restaurant called Aladin! For non UK readers, Brick Lane was the title of a book set in this area of London written by Monica Ali. It was also made into a movie and is about a Bangladeshi woman who comes to England after an arranged marriage. If you haven't read it, it is a nice read and the movie was also good.
Onto crafting now!!! I have a bag of leather offcuts and they have been doing nothing for quite a while! I decided to make some flowers using some new Sizzix dies that I recently purchased.
I made some quick and simple ones to start with which will be good to sell at fairs I think. The one die was used to cut all the layers on the flowers. I made a few different colour combos and turned them into brooches.
I have another Sizzix die that cuts out 2 different sized petals to make large flowers and I saw a fab video on YouTube which I followed. My petals are bigger and a different shape but I am really pleased with how the flower came out. It is very large and a gorgeous vibrant pink colour. I also made this into a brooch! I have put a £1 coin next to the flower just to show how big it is!
Onto crafting now!!! I have a bag of leather offcuts and they have been doing nothing for quite a while! I decided to make some flowers using some new Sizzix dies that I recently purchased.
I made some quick and simple ones to start with which will be good to sell at fairs I think. The one die was used to cut all the layers on the flowers. I made a few different colour combos and turned them into brooches.
I have another Sizzix die that cuts out 2 different sized petals to make large flowers and I saw a fab video on YouTube which I followed. My petals are bigger and a different shape but I am really pleased with how the flower came out. It is very large and a gorgeous vibrant pink colour. I also made this into a brooch! I have put a £1 coin next to the flower just to show how big it is!
Hope you like them!
Labels:
Brick Lane,
flowers,
leather,
london
Friday, 21 March 2014
A Mother's Day Card
Hi there
I spoke too soon about the weather improving!!!! It's turned cold and wet again! The summer was on it's way but took a wrong turn!!
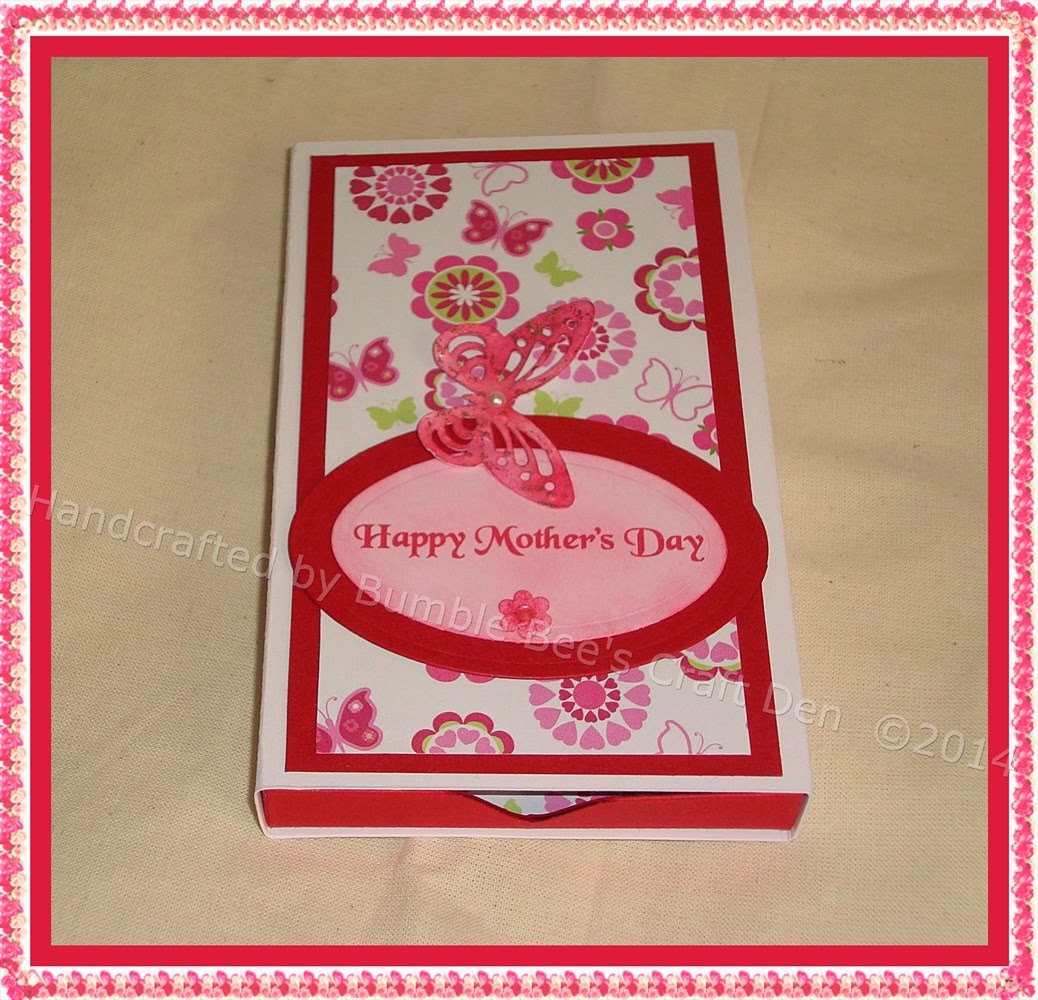
Here in the UK it is Mother's Day, also known as Mothering Sunday on 30 March. I haven't made cards for at least a year or maybe more but saw this unusual 3d matchbox style card on Pinterest with a great tutorial and thought I would have a go! Here is the tutorial by Stampin Haven.
It's made using an Envelope Punch Board - We r Memory Keepers or Stampin Up! make them. If you haven't got one of these boards then you don't know what you are missing!! You can do so much with them!!
Here is the card that I made for my mum.
I'm pleased with how it has come out, especially as I am out of practice!!! Hope you like it too!
I spoke too soon about the weather improving!!!! It's turned cold and wet again! The summer was on it's way but took a wrong turn!!
Here in the UK it is Mother's Day, also known as Mothering Sunday on 30 March. I haven't made cards for at least a year or maybe more but saw this unusual 3d matchbox style card on Pinterest with a great tutorial and thought I would have a go! Here is the tutorial by Stampin Haven.
It's made using an Envelope Punch Board - We r Memory Keepers or Stampin Up! make them. If you haven't got one of these boards then you don't know what you are missing!! You can do so much with them!!
Here is the card that I made for my mum.
I'm pleased with how it has come out, especially as I am out of practice!!! Hope you like it too!
Labels:
Card,
Envelope Punch Board,
Mother's Day
Saturday, 15 March 2014
Homemade Printed Cloth Labels
Hi everyone
Hope that you are all enjoying your weekend so far. We have lovely blinding, sunshine but it is feeling very chilly! Can't complain though as at least it isn't raining!!
I've been wanting some cloth labels for my makes for a long time but they are so expensive to buy! I been searching and saw various ways of making them yourself either by stamping or by printing onto t-shirt transfer paper. I finally had a go at using the t-shirt transfer way and was really pleased with the results. I managed to make 105 labels from just one sheet! I used some plain cotton tape this is around 25p a metre - I had some in cream and some in white so used both colours so that they would match with items that I make! Sometimes a white label will look better on a colour than a cream one and vice versa!! I know - that makes me sound abit OCD!
Tutorial link at the bottom of post!!
Here are my finished labels
I've stitched them onto the back of my felt shabby hearts. I think it gives them a more professional look and it means that although my crafting name is on the heart, it doesn't get in the way of the front design of the heart.
I will do a tutorial and pop it on my side bar for you to have a go.
*****Link to tutorial*****
Hope that you are all enjoying your weekend so far. We have lovely blinding, sunshine but it is feeling very chilly! Can't complain though as at least it isn't raining!!
I've been wanting some cloth labels for my makes for a long time but they are so expensive to buy! I been searching and saw various ways of making them yourself either by stamping or by printing onto t-shirt transfer paper. I finally had a go at using the t-shirt transfer way and was really pleased with the results. I managed to make 105 labels from just one sheet! I used some plain cotton tape this is around 25p a metre - I had some in cream and some in white so used both colours so that they would match with items that I make! Sometimes a white label will look better on a colour than a cream one and vice versa!! I know - that makes me sound abit OCD!
Tutorial link at the bottom of post!!
Here are my finished labels
I will do a tutorial and pop it on my side bar for you to have a go.
*****Link to tutorial*****
Labels:
Cloth Labels
Wednesday, 12 March 2014
Spring is in the Air!
Well, the weather has certainly been abit better although it seems to have got colder. We even had a warm sunny day last Sunday. I took advantage of it and dug out a lightwight summer top and went with a friend to a Caribbean Restaurant where we sat outside and drank cocktails in the sun - it was lovely to be able to do this!! Sadly, no sun since so back to wearing my warmer clothes!! Hopefully Spring is here now at least as lots of beautiful flowers starting to bloom.
I've not made that much recently - after the Christmas rush I seemed to burn myself out! Anyway, I've started to slowly get myself sewing again and made some more shabby felt hearts and a cute felt bunny.
Here are some of the hearts
All available to order over at my Bumblebee's Craft Den Facebook page
Here is the felt bunny. I think he is rather cute! I made him totally by hand (as I do with all of my items!)
Thanks for stopping by. I am also over on Pinterest if you fancy having a look!
I've not made that much recently - after the Christmas rush I seemed to burn myself out! Anyway, I've started to slowly get myself sewing again and made some more shabby felt hearts and a cute felt bunny.
Here are some of the hearts
All available to order over at my Bumblebee's Craft Den Facebook page
Here is the felt bunny. I think he is rather cute! I made him totally by hand (as I do with all of my items!)
Thanks for stopping by. I am also over on Pinterest if you fancy having a look!
Sunday, 9 February 2014
Retro Love Heart Brooches
Well we are having some horrific weather here in my corner of the UK. There has been flooding like we've never seen before and the Somerset Levels have been engulfed in so much water from rivers bursting their banks that it has become an island within an island. The train services have been cut off to alot of the extreme South West due to damaged rail lines and in Dawlish part of the track collapsed into the sea completely, thankfully when there was not a train passing over it. I really feel for the people whose houses have been flooded and everyone else affected and hope that they are given proper help from Government and the EU to enable them to try and get their lives back on track again.
I have tried not to venture out into the heavy rain and wind unless it was to go to work and have done a bit of sewing at home instead.
I enjoy making felt brooches and wanted to do something that could be Valentine themed but used at any other time of the year. I'd seen various versions of retro heart brooches on Pinterest and decided to make some of my own.
They are abit fiddly but I am really pleased with how they turned out!
There are a few available on my Facebook page for £4.00 each plus p & p if you'd like one.
I have tried not to venture out into the heavy rain and wind unless it was to go to work and have done a bit of sewing at home instead.
I enjoy making felt brooches and wanted to do something that could be Valentine themed but used at any other time of the year. I'd seen various versions of retro heart brooches on Pinterest and decided to make some of my own.
They are abit fiddly but I am really pleased with how they turned out!
There are a few available on my Facebook page for £4.00 each plus p & p if you'd like one.
Labels:
Retro hearts
Subscribe to:
Posts (Atom)